Note: Parts of this feature are only accessible to Account Admins and Owners only.
DoneDone Users are organized into Companies, Users, and Guests. This makes it easy to organize multiple clients and organizations inside your account.
Guests #
In this article, we will focus on how to invite guests to your DoneDone account. To learn more about the functionality of guest users, visit our “Account Roles and Permissions” help doc.
To add a Guest to your account:
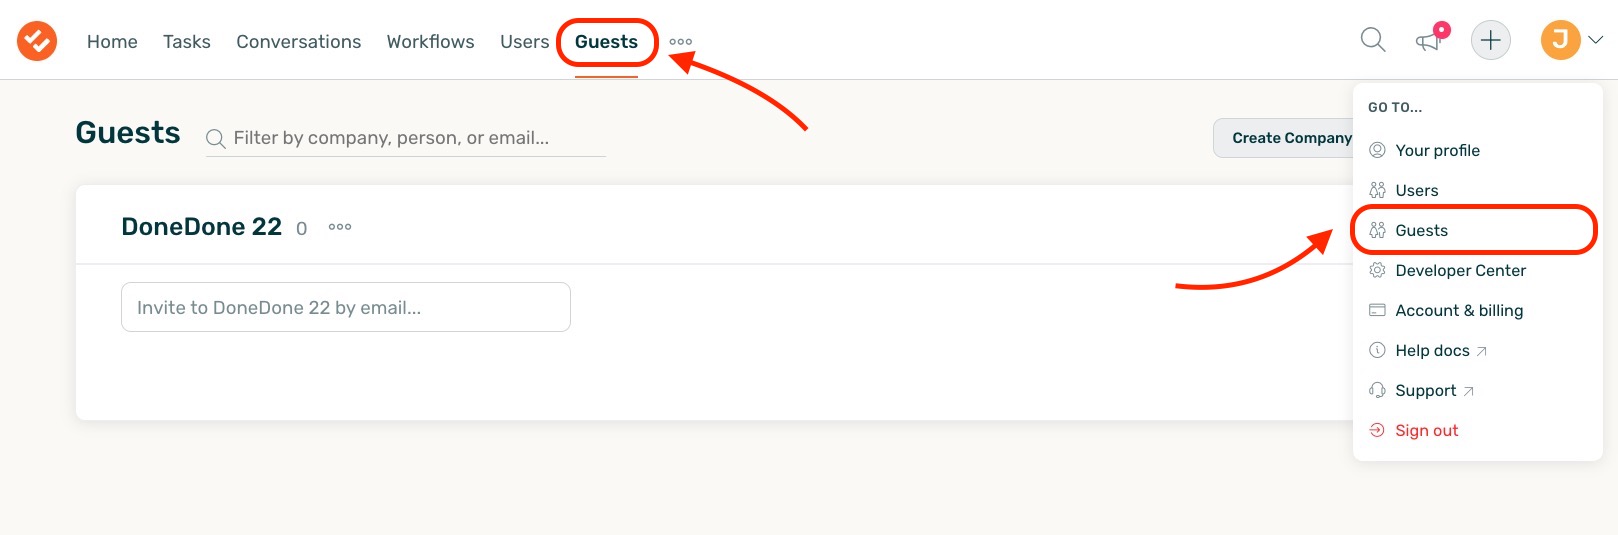
After you’ve signed in to your account, choose the Guests tab at the top of your screen. Or, click your avatar on the upper-right, then choose Guests. (Alternatively, you can directly invite and add a Guest to a project by clicking the “+” button and adding the guest by email, on any project)
Next, select the blue button “Invite Guest”
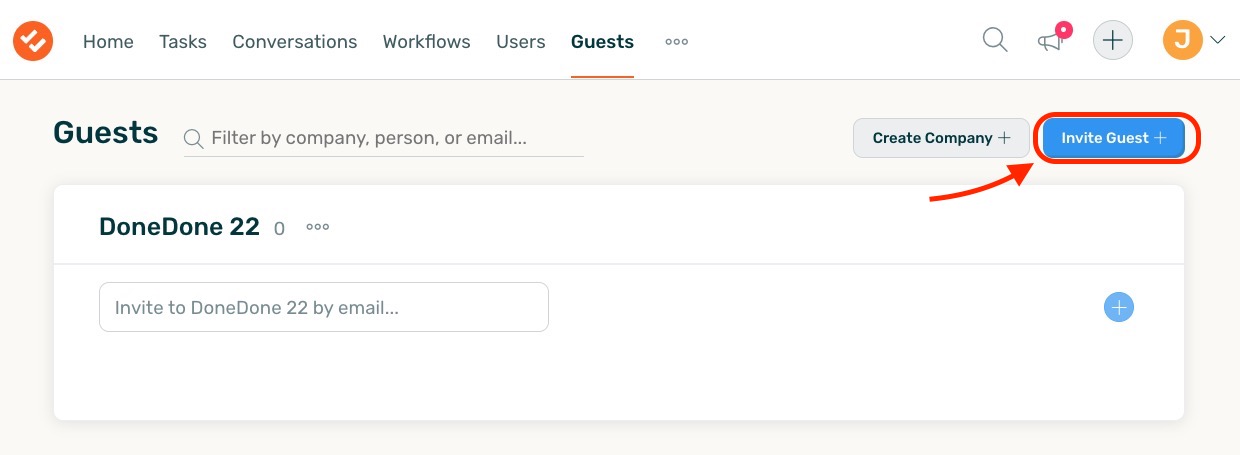
After clicking this button, you can invite as many users to be guests to your account as you’d like, for free. Simply enter their email address, and they will receive an invite to your DoneDone in their inbox.
Once a user has been invited to the account, they will not be able to see any Tasks, Projects, or Mailboxes yet. To invite them to a Project, you must first select the “Add to projects” button, and add them to a Project, as shown below.
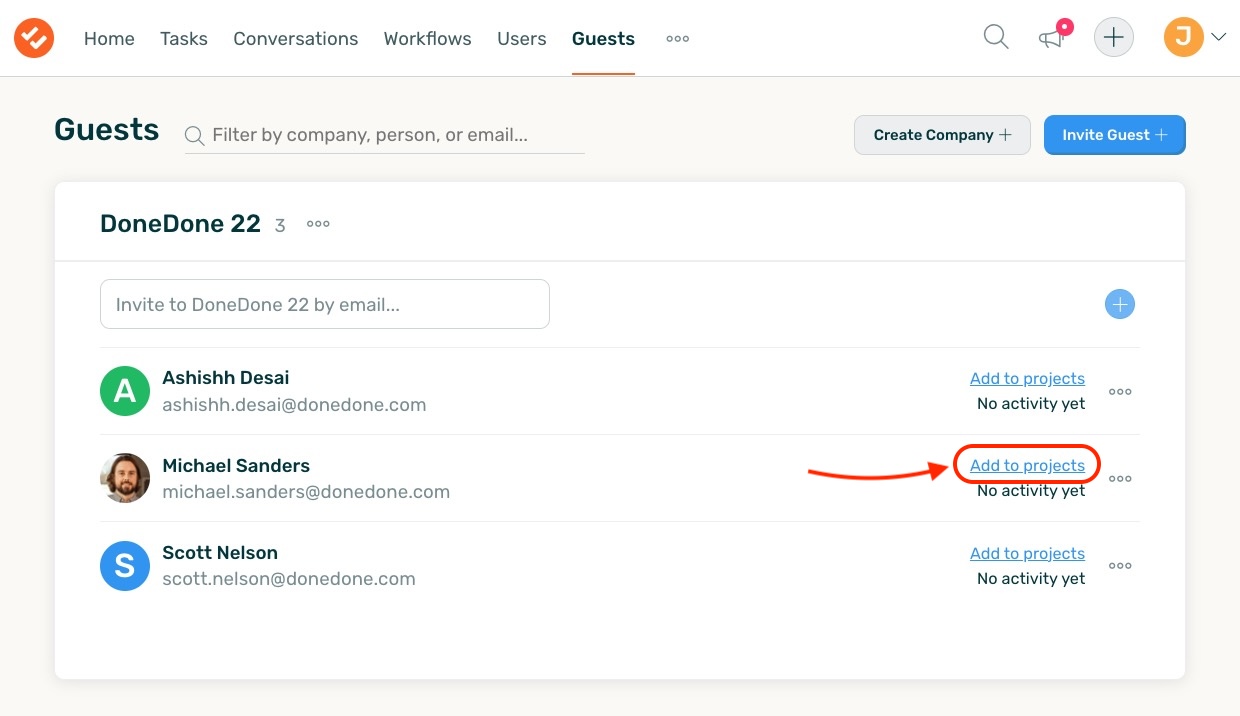
Once you have added them to a Project, that’s it! They are ready to view the Project.
Note: Guests cannot add new tasks or edit tasks they aren’t assigned to. For more information about guest functionality, visit this our help doc: “Guests: Everything you need to know“.
Adding a Company #
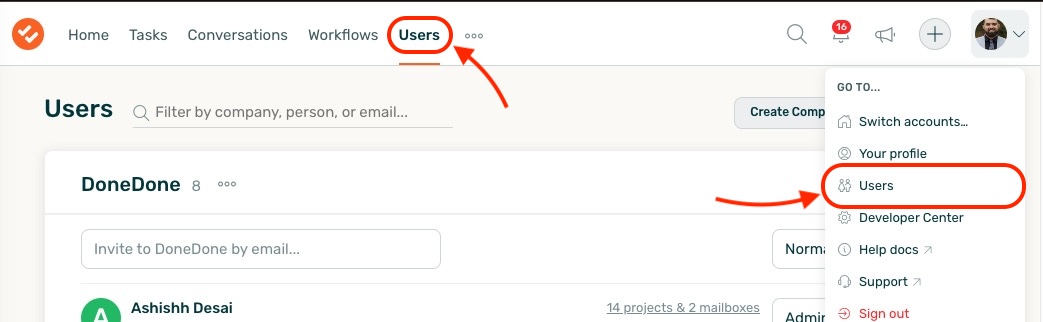
After you’ve signed in to your account, choose the Users tab at the top of your screen. Or, click your avatar on the upper-right, then choose Users.
To add a new Company, click Create New Company at the top of the Users section.

On the Create Company screen, enter the Company name, then enter the email addresses of the Users you want to invite to your account. You can also choose the account role for each User.
Once you click “Create Company & Send Invites”, each User you invited will receive an email from DoneDone with a link to complete registration.

Managing Users #
From the Users home screen, you can manage the following for each User in your account:
- Re-send invites to Users who have not completed their registration.
- Email a password reset link to Users who have forgotten their password.
- Delete a User from the account.
- Edit a User
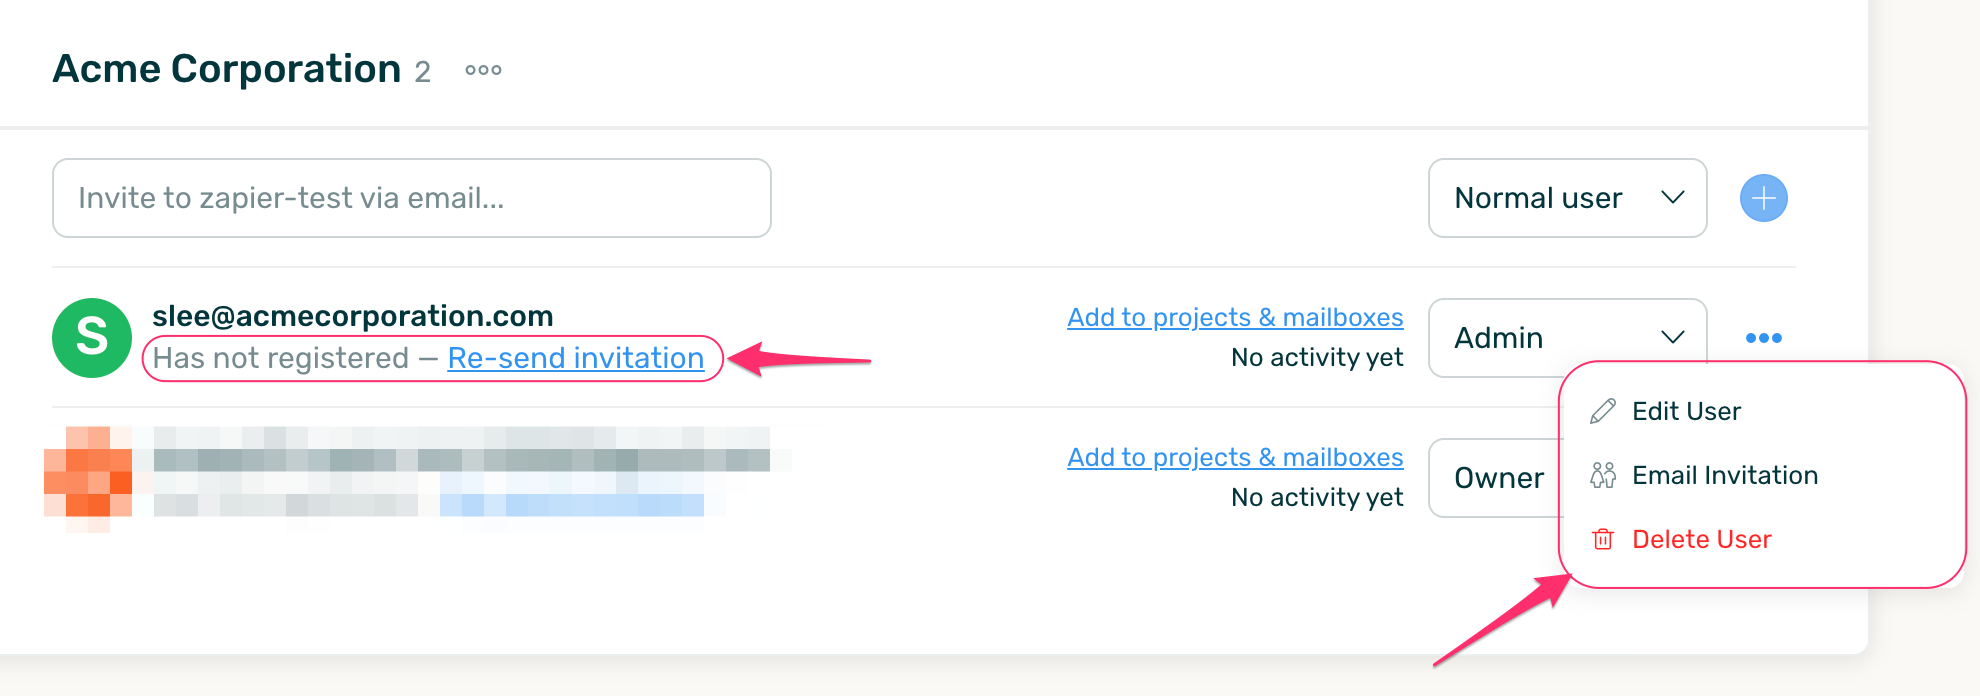
Editing a User #
You can edit the details of a User by going to their “detail” page. Do this by either clicking “Edit User” from the “More” dropdown as shown above or clicking directly on their name/email address on the left.
Inside the detail page, you can manage the following:
- The Mailboxes and Projects that the User has access to.
- The User’s account role.
- The Company the User belongs to.

Deleting a User #
You can completely remove a User from your account in one of two places:
- On the User home screen, by clicking the “More” dropdown and selecting “Delete User” or…
- On the User’s “detail” page, by clicking the “More” dropdown and selecting “Delete User”.
When deleting a User, you will be asked who should be re-assigned any tasks or conversations the User is currently on. You can also select “No one”, in which case all of the User’s assigned tasks and conversations will become unassigned.

Deleting a Company #
You can only delete companies if the Company has no members inside of it. When that’s the case, on the Users home screen, there will be an option to “Delete Company” under the “More” dropdown next to the Company’s name.


