Setting up the Auto-Responder and Office Hours
You can customize your Mailbox to send an auto-response to customers whenever an email arrives. This is a great way to let customers know when to expect a reply from your staff.
We allow you to customize an auto-response for each of these situations:
- On newly created conversations
- On replies to existing conversations
- During office hours
- After office hours
For example, you can have one single auto-response to cover every scenario. Or, you can have a specific auto-response for new conversations outside of your office hours, or one that's specific to replies during office hours. This gives you the flexibility to customize responses based on the situation.
Setting up the Auto-Responder
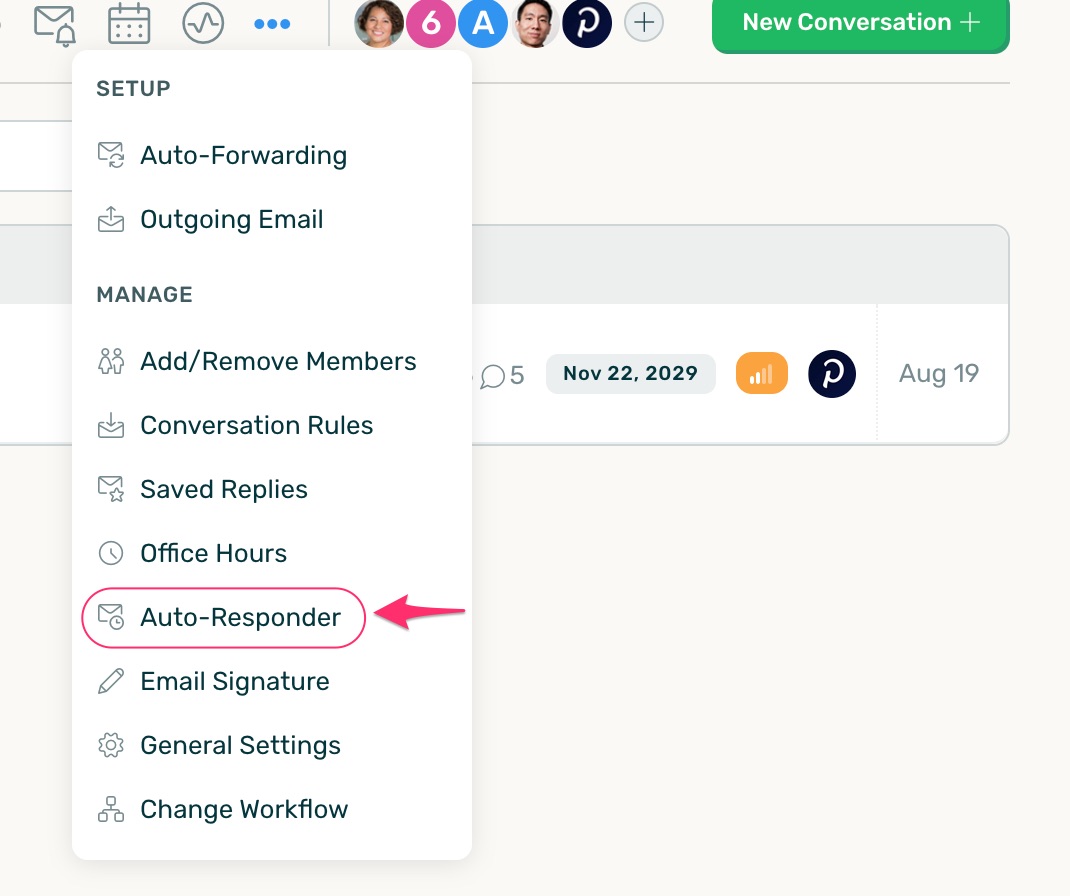
To set up the Auto-Responder, go to the Auto-Responder settings section within your Mailbox.
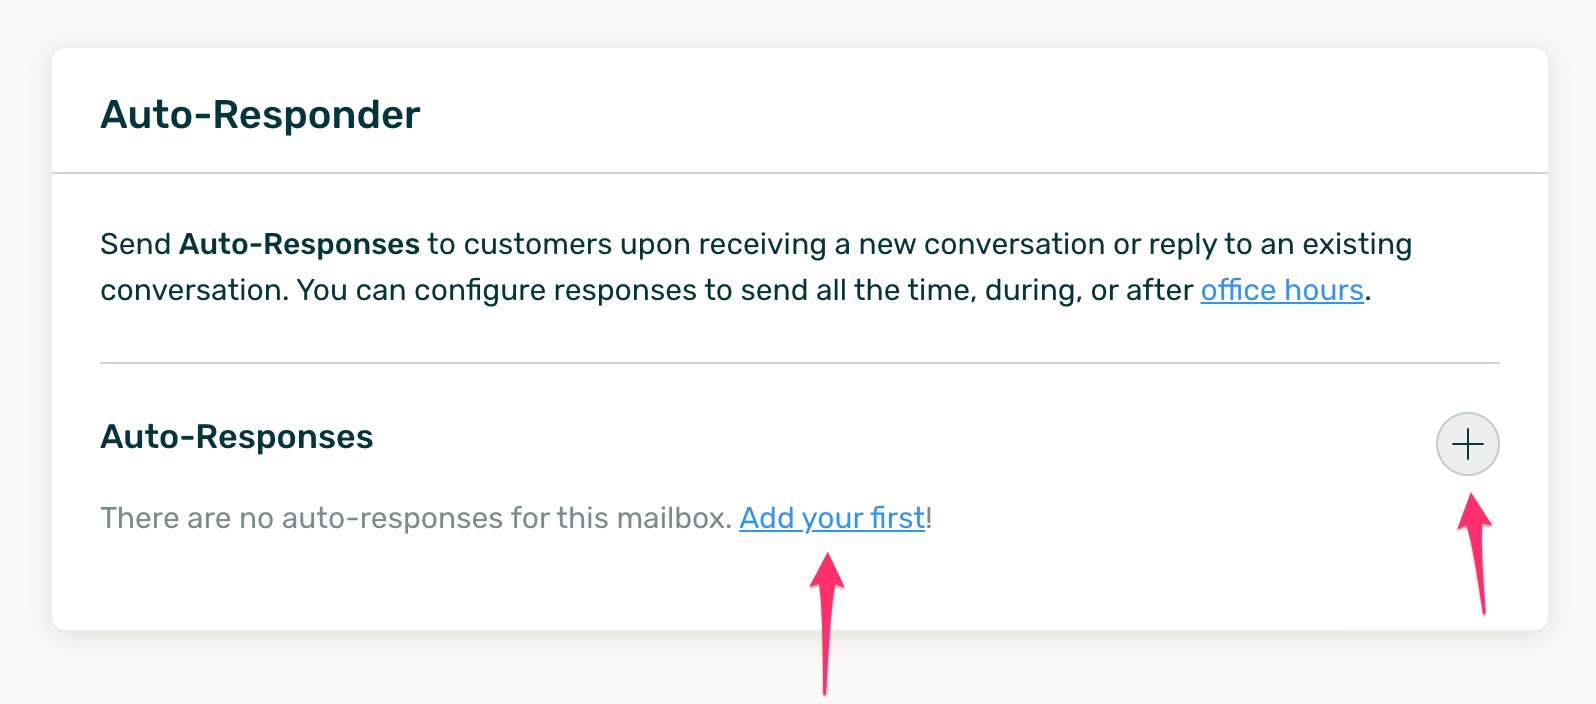
Once you're there, add your first auto-response:
On the resulting modal, enter a Title and Message for your auto-response.
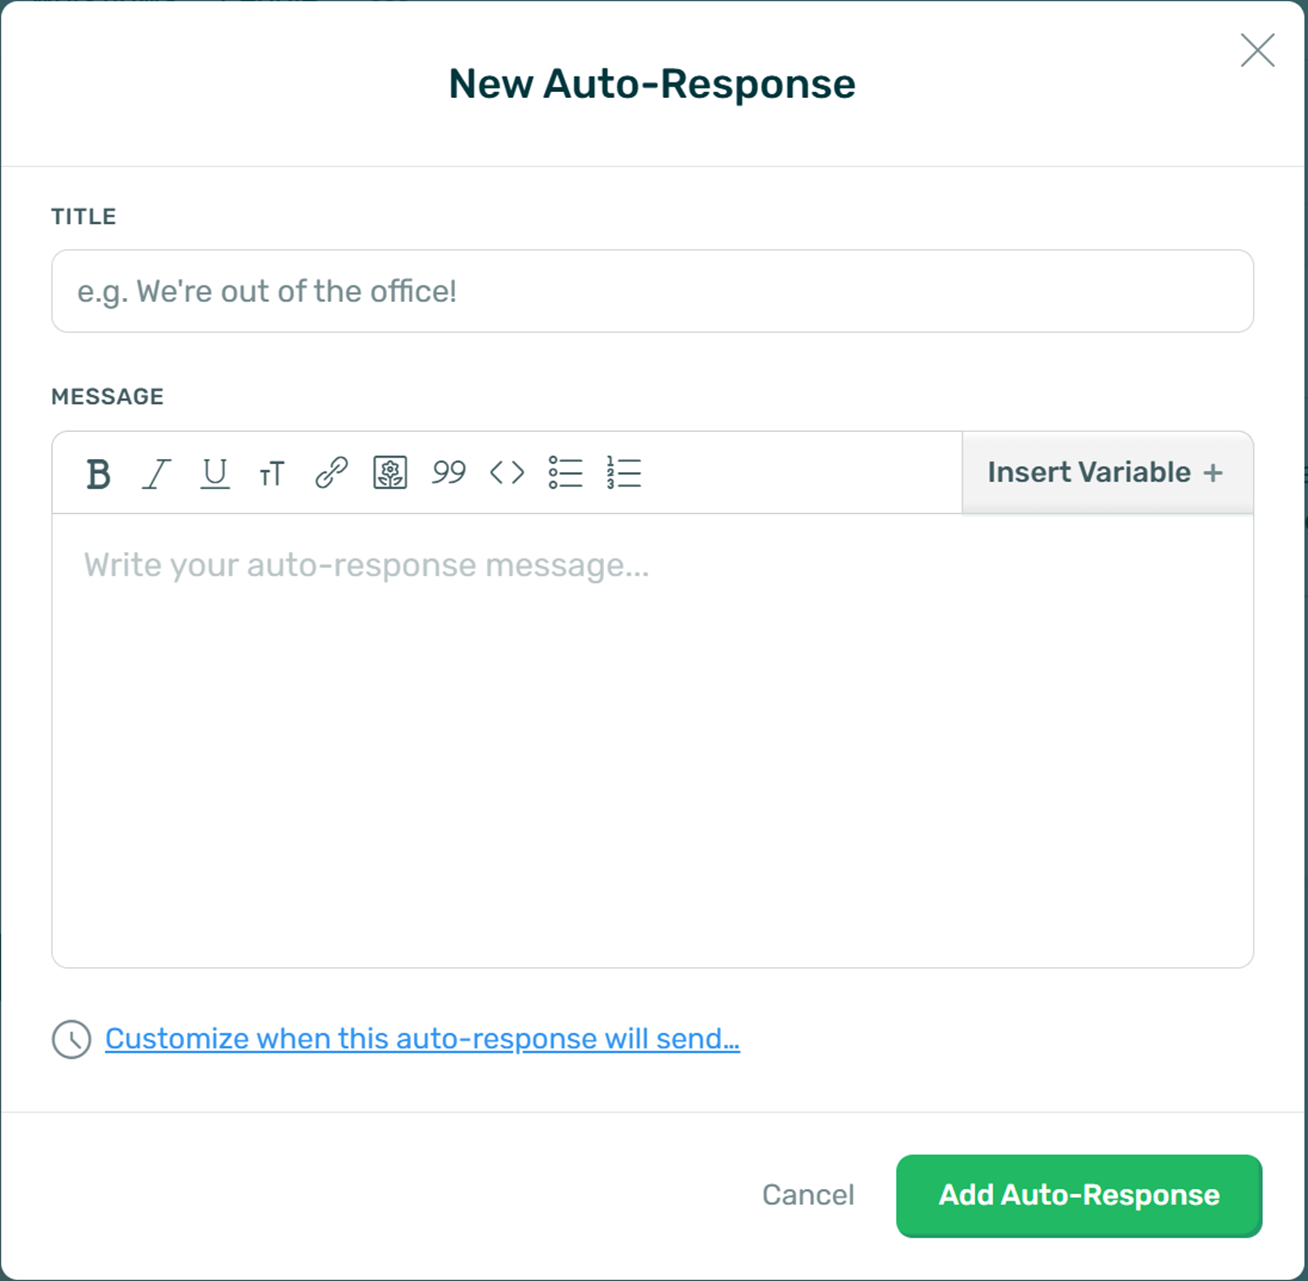
DoneDone currently provides these variables you can use within your response:
- Customer Full Name - This will be replaced by the full name of the customer when the auto-reply is sent back to them. The customer name is derived from the name provided in their original email sent to DoneDone.
- Customer First Name - The first name of the customer.
- Customer Last Name - The last name of the customer.
- Reference Number - This will be replaced by the Conversation # when the auto-reply is sent back to them. A customer does not need to know the conversation # (as all correspondences are sent as regular email to them). However, if you provide phone support as well, having the reference number at hand will help your customer and phone support staff more quickly find the original email conversation.
Customizing when an auto-response is sent
By default, an auto-response will send whenever someone sends an email to your Mailbox. However, you can customize when it's sent by clicking the "Customize when this auto-response will send..." link and choosing the scenarios you want this auto-response sent.

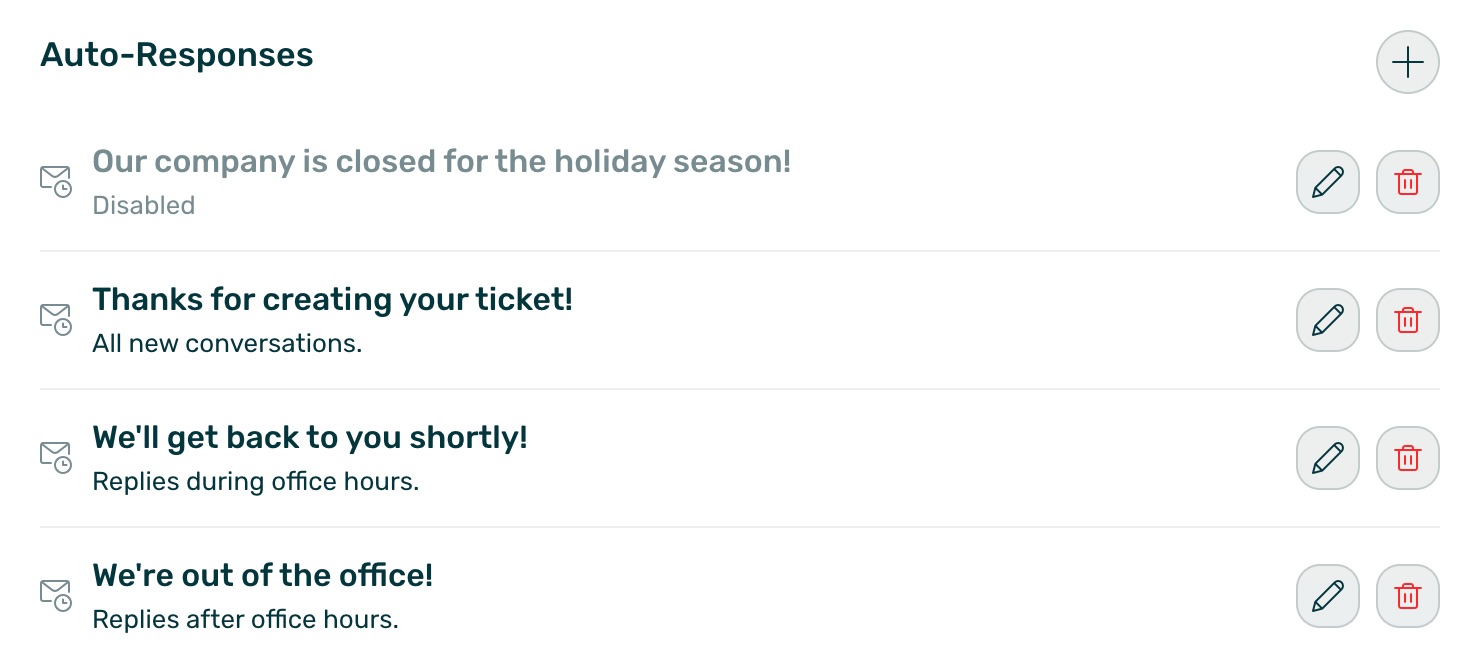
You can add as many auto-responses as needed. For example, you may want to add a different auto-response for when your company goes on holiday break. Just add it without any of the options turned on, and then enable it at the right time. When you're back in the office, you can disable it and turn the other ones back on.
Setting up Office Hours
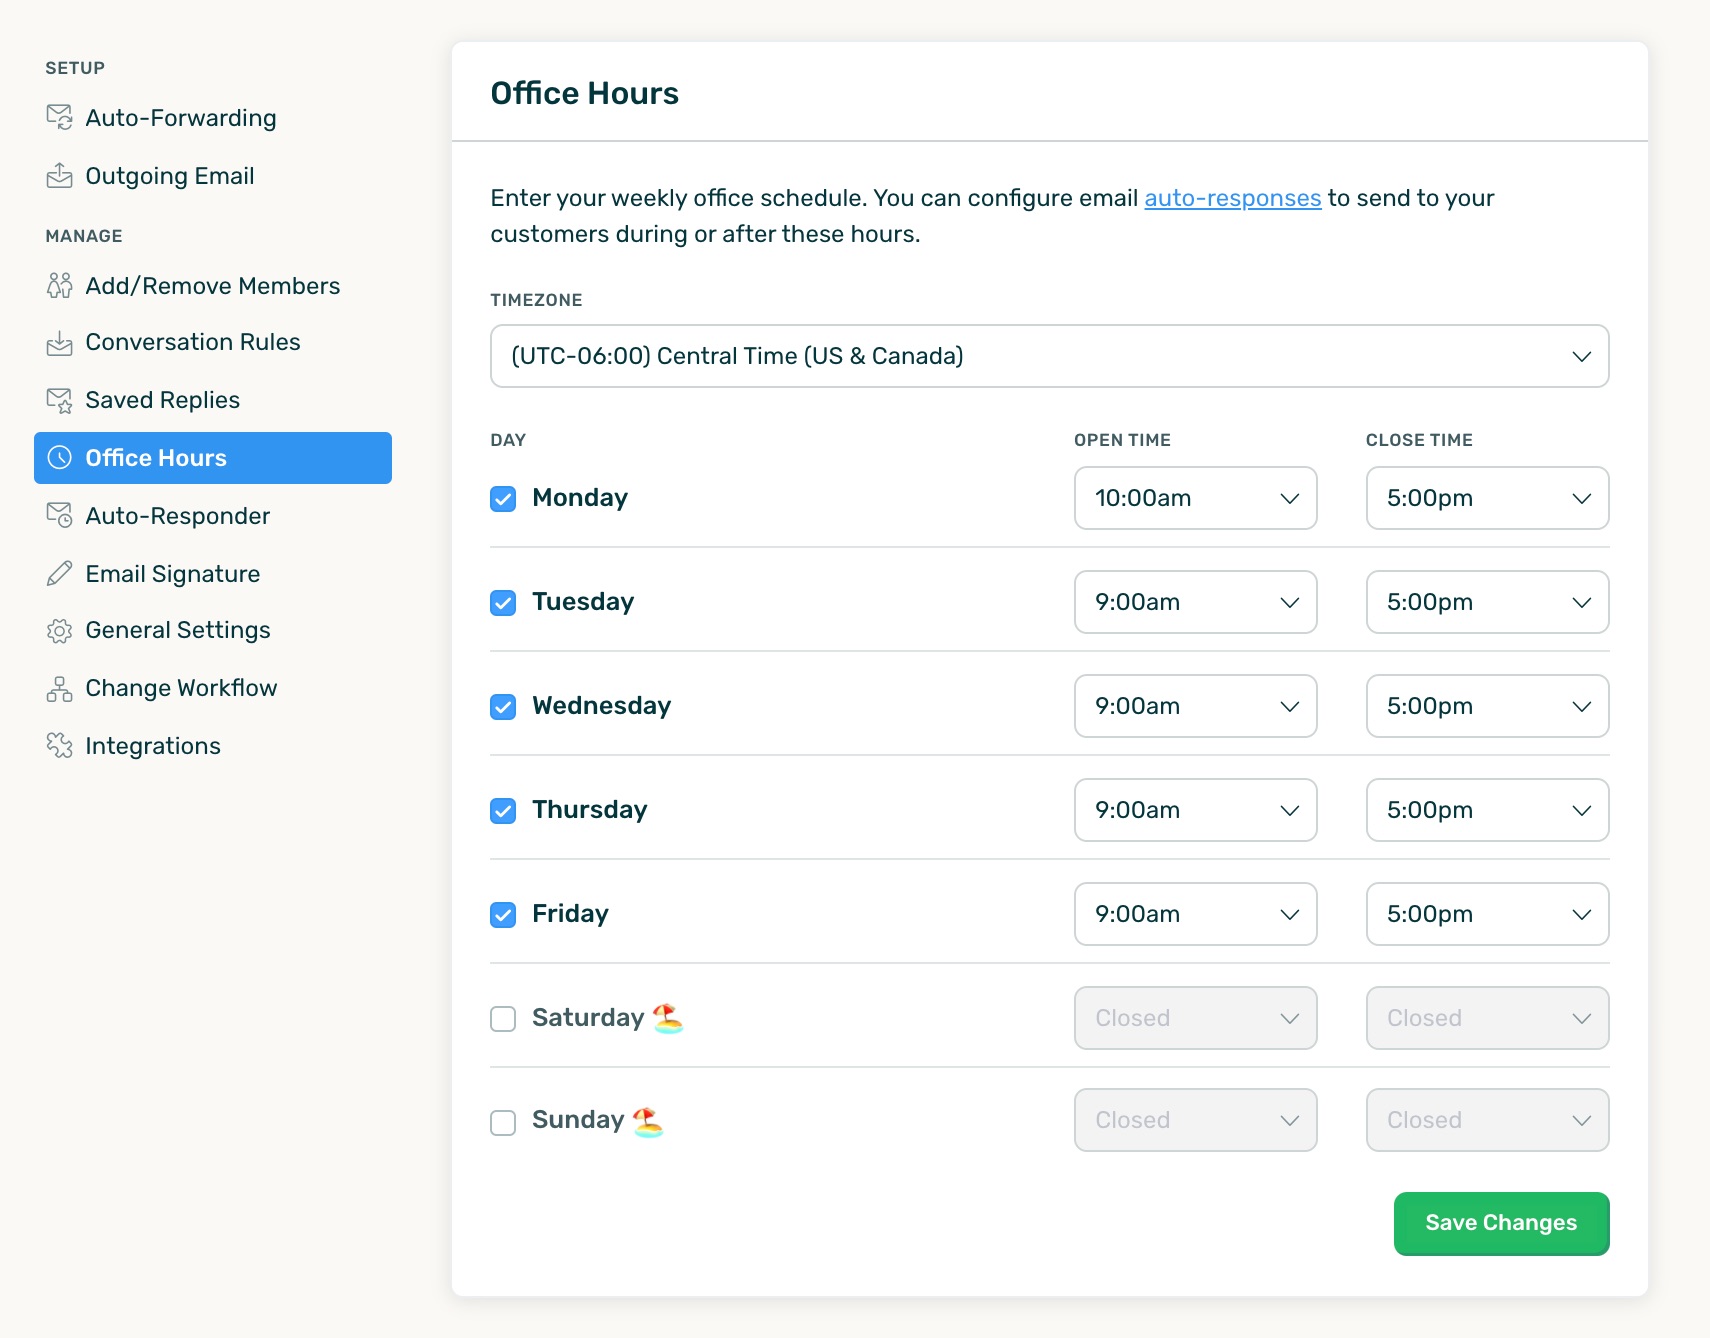
If you've chosen to send an auto-response during or after office hours only, then you will also need to configure what those office hours are.
To do this, go to the "Office Hours" settings section and enter your company's timezone and work schedule. Now, auto-responses will send if an email is received during or after office hours based on these times. That's it!
Lastly, we only send one auto-response to a customer per hour. In other words, if someone sends four different emails to your Mailbox within one hour, they will only get one auto-response (to the first email they sent). This way, the customer isn't bombarded by auto-responses if they send multiple emails in a short time span.


.png)