In this article, we will do a deep-dive on Guests.
Users: Guest users are available only on our Pro plans. If you created your account prior, and wish to use this feature, you will need to reach out to customer support to transfer your account to one the new 2025 pricing plans.
We will break this deep-dive down into 4 segments, as shown below:
- Guest Functionality & Permissions
- Adding a Guest to your account
- Adding/Removing a Guest to/from a Project
- Upgrading a Guest to a User
- Removing a Guest from your account
Before reading, we wanted to let you know that the video below will cover all of the subjects in this help doc. Watch this video or share it if you’d like to!
1. Guest Functionality & Permissions #
Guests on your DoneDone account are often used for adding your client to approve of a project/task, or to keep updated on their project’s progress in real time.
The number of guest users you have on your account is unlimited. Guests are also completely free, meaning, they do not take a User Seat from your total Seat count.
Guest users do have limited functionality.
Guests can: #
- Be added as a “Watcher” for any task
- Comment on any task
- Change the status of any task they are assigned to
Guests can’t: #
- Create tasks
- Edit a task’s title, description, priority, due date, assignee, or status (if not task’s assignee)
- Link or unlink tasks to/from other tasks
- Reassign a task to a different project
- See linked conversations
- See Projects or Mailboxes which they are not assigned to being a part of.
- Participate in Mailboxes whatsoever
2. Adding a Guest to your account #
Adding a guest user is simple. You can add a guest user by following the instructions below:
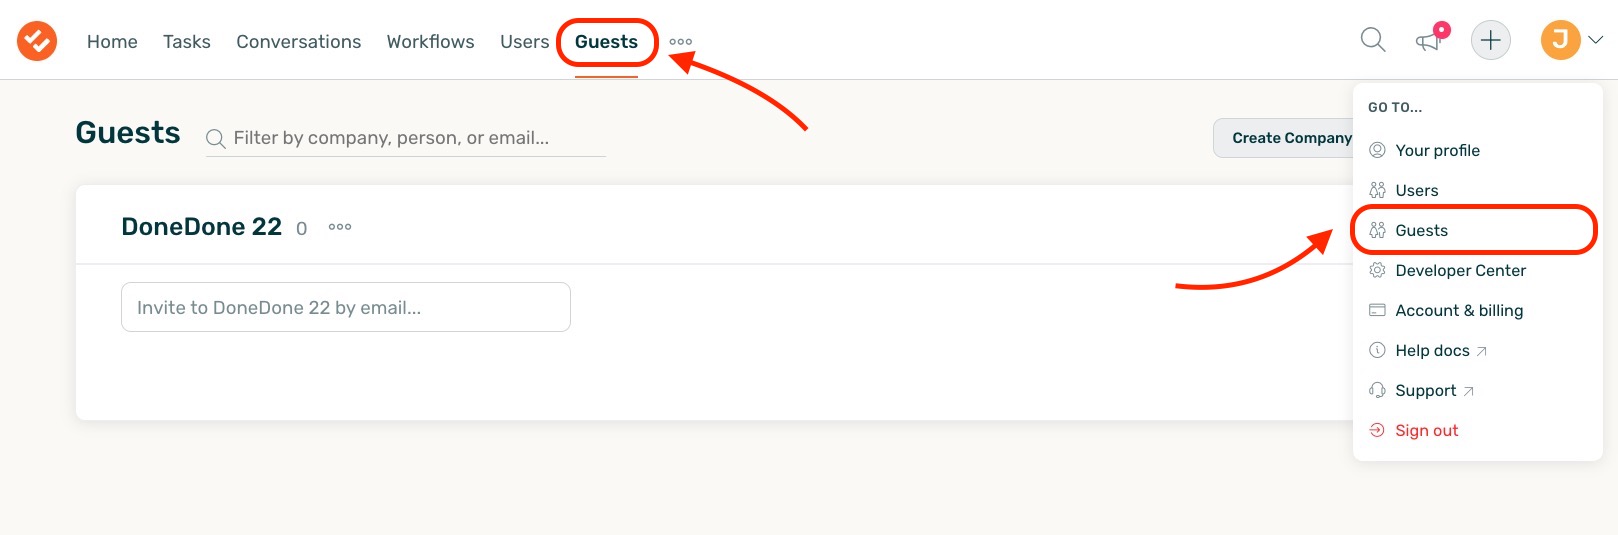
After you’ve signed in to your account, choose the Guests tab at the top of your screen. Or, click your avatar on the upper-right, then choose Guests. (Alternatively, you can directly invite and add a Guest to a project by clicking the “+” button and adding the guest by email, on any project)
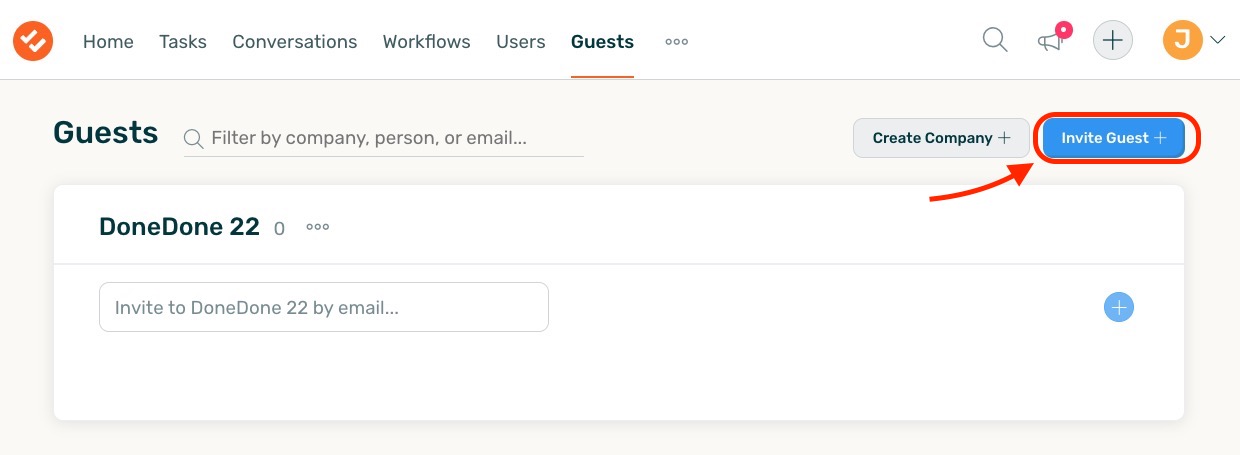
Next, select the blue button “Invite Guest”
After clicking this button, you can invite as many users to be guests to your account as you’d like, for free. Simply enter their email address, and they will receive an invite to your DoneDone in their inbox.
Once the Guest has accepted their invitation, they will have their own DoneDone Dashboard. They will only be able to see the Projects that you have added them to. By default, the guest user is not assigned to any Projects. We will show you how to add them in the next section.
3. Adding/Removing a Guest to/from a Project #
Once a user has been invited to the account, they will not be able to see any Tasks, Projects, or Mailboxes yet.
Adding a Guest to a Project #
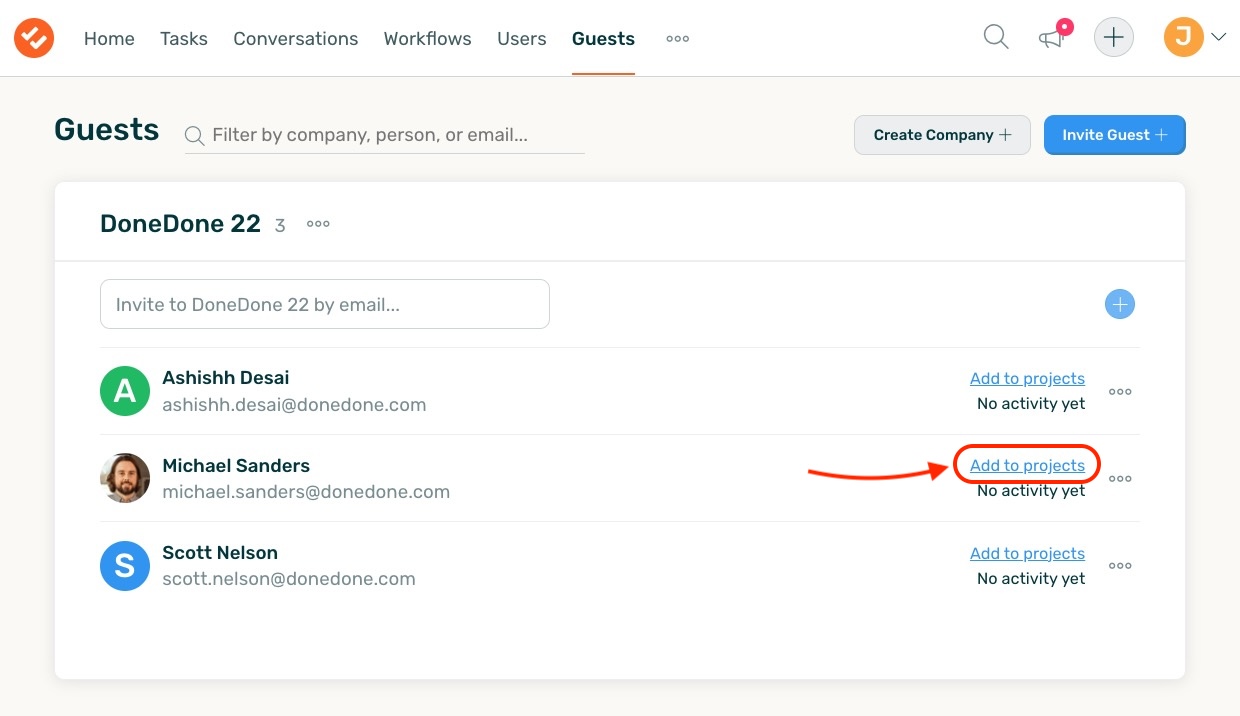
To invite them to a Project, first navigate to the “Guests” tab.
Select the “Add to projects” button for the Guest, as shown below.
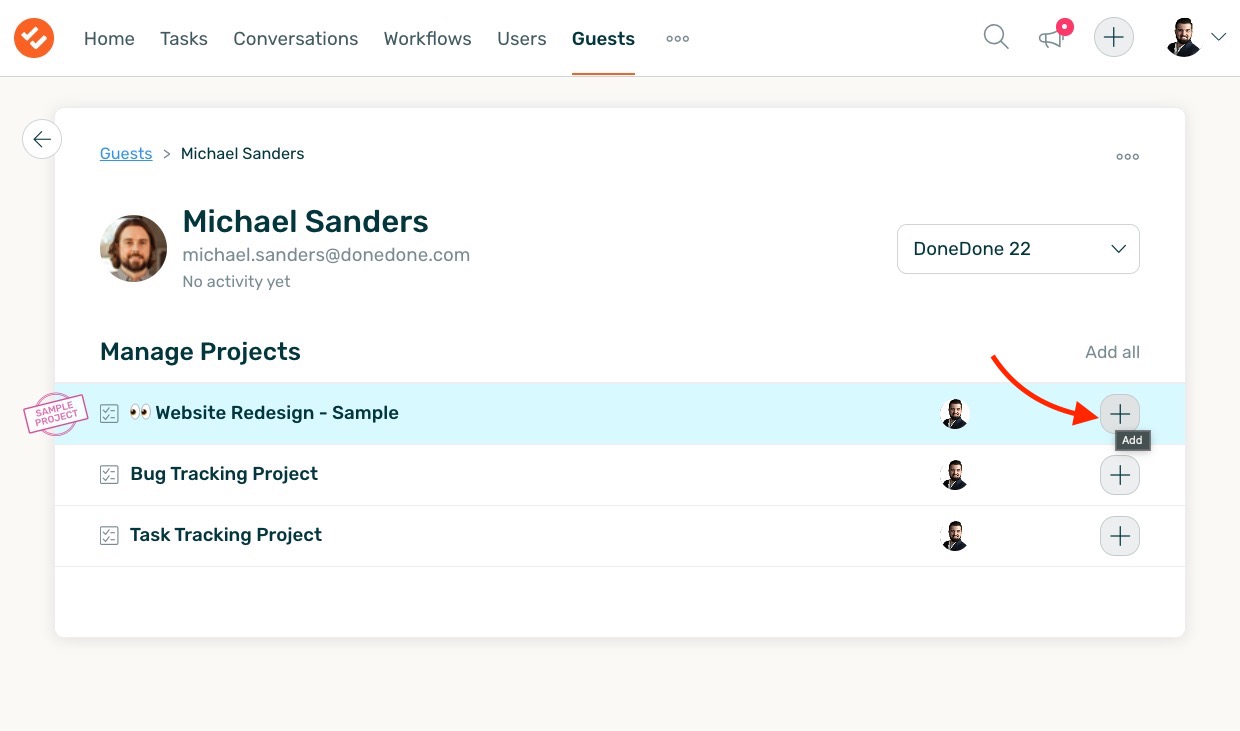
You will now see all of your Projects. You can assign a Guest to as many or as few Projects as you’d like.
For now, we will add this Guest to the “Website Redesign – Sample” Project by clicking the big “+” button on this Project. This will successfully add the Guest to the Project, and the Project will now show up on the Guest’s dashboard.
Note: Guests cannot add new tasks or edit tasks they aren’t assigned to. To assign them to a Task, simply create a new task, or edit an existing task, and select the Guest as the “Assignee” on the Task.
Removing a Guest from a Project #
To remove a Guest from accessing a Project, and seeing the Project on their Dashboard:
Navigate to the interface you added them to the project on, as shown in the steps above.
Next, simply click on the checkmark on the corresponding Project you would like to remove them from.
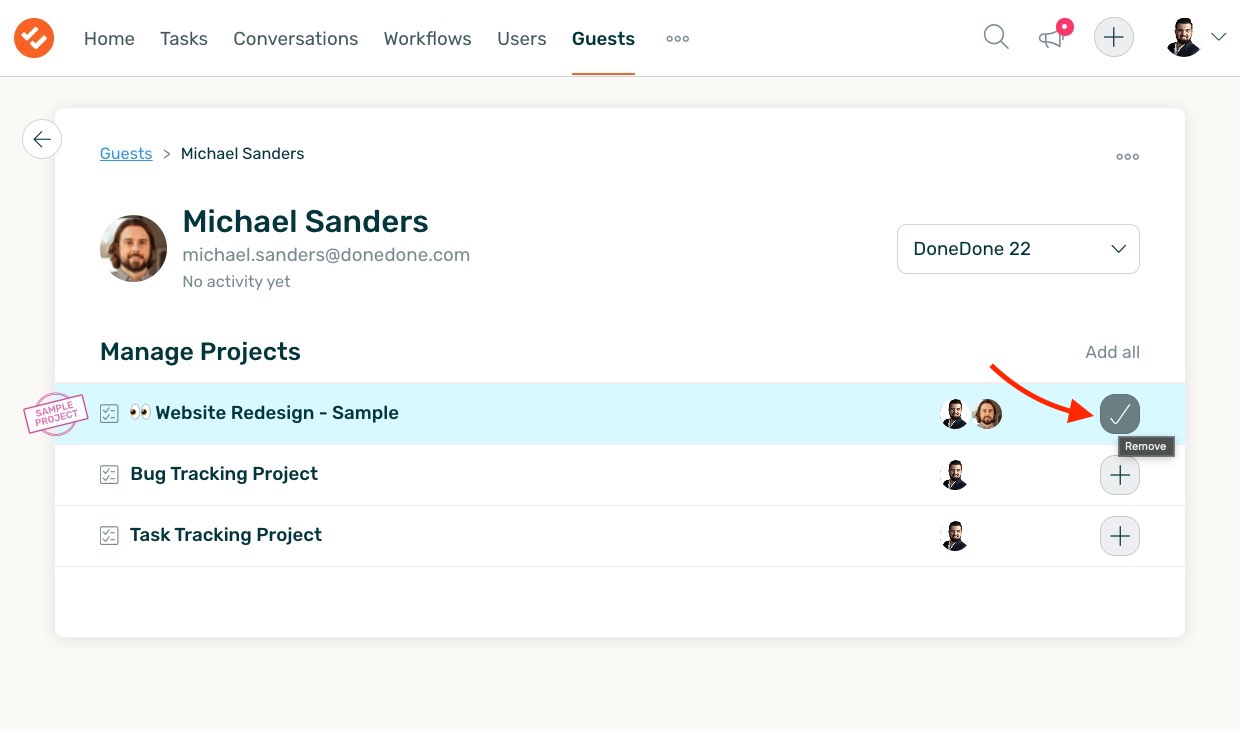
Once clicked, the Guest will be instantly removed from the Project.
Upgrading a Guest to a User #
Note: Upgrading a Guest to a User Role will take one of your account’s User Seats. This means, they will be a User taking one of your Seats on your paid account plan. To learn more about User seats and adding additional seats, visit our help doc: “Plans, Pricing, Billing, and User Seats“
First, we must delete the Guest User. Later, we will re-invite them by email as a User.
Navigate to the “Guests” tab.
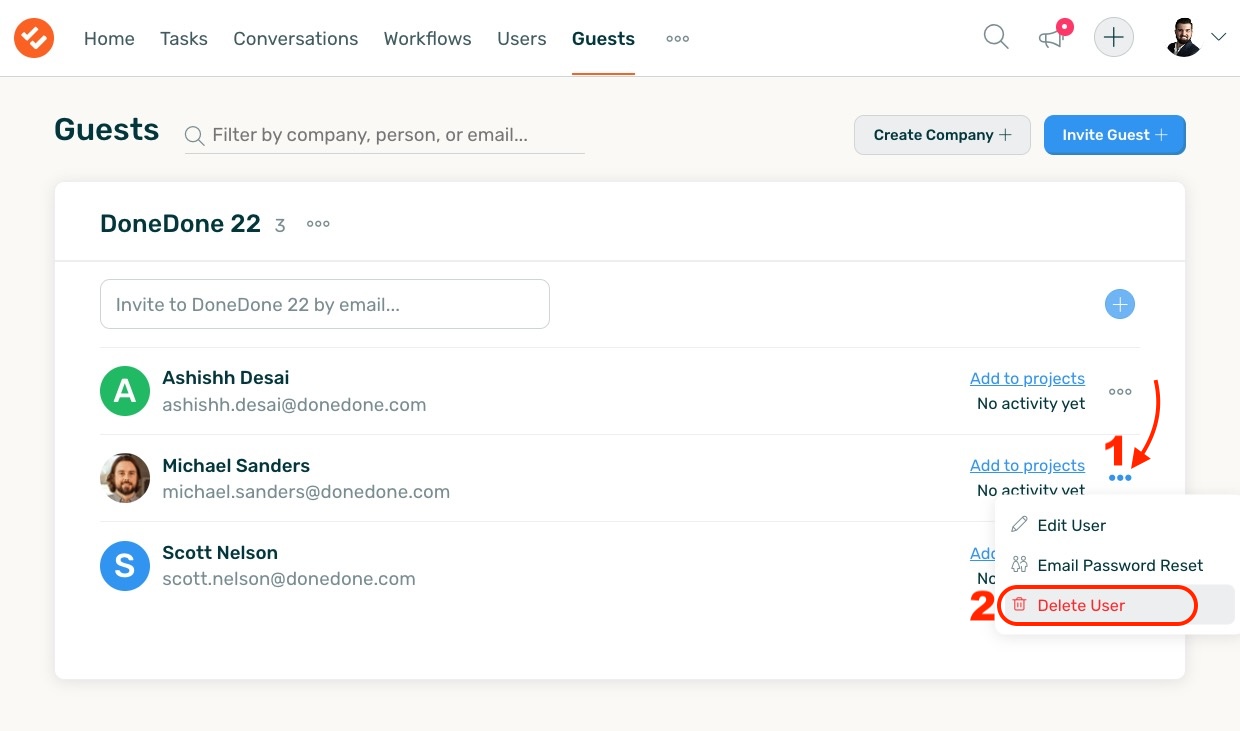
Next, click the three dots for the Guest. Click “Delete User” as shown below.
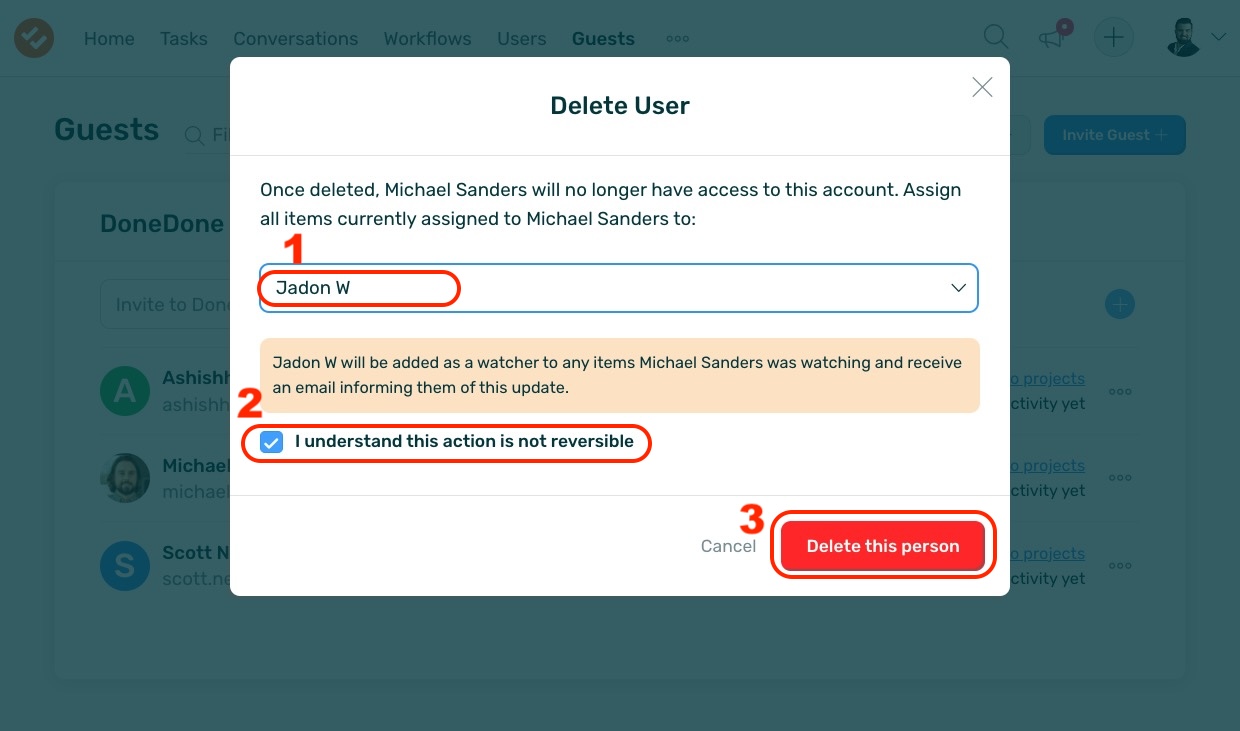
Next, you will see the interface show below. In this case, I reassigned all of this Guest’s Tasks to myself, which I will reassign to them once they are re-added to my account as User.
Be sure to check the checkbox before clicking “Delete this person”
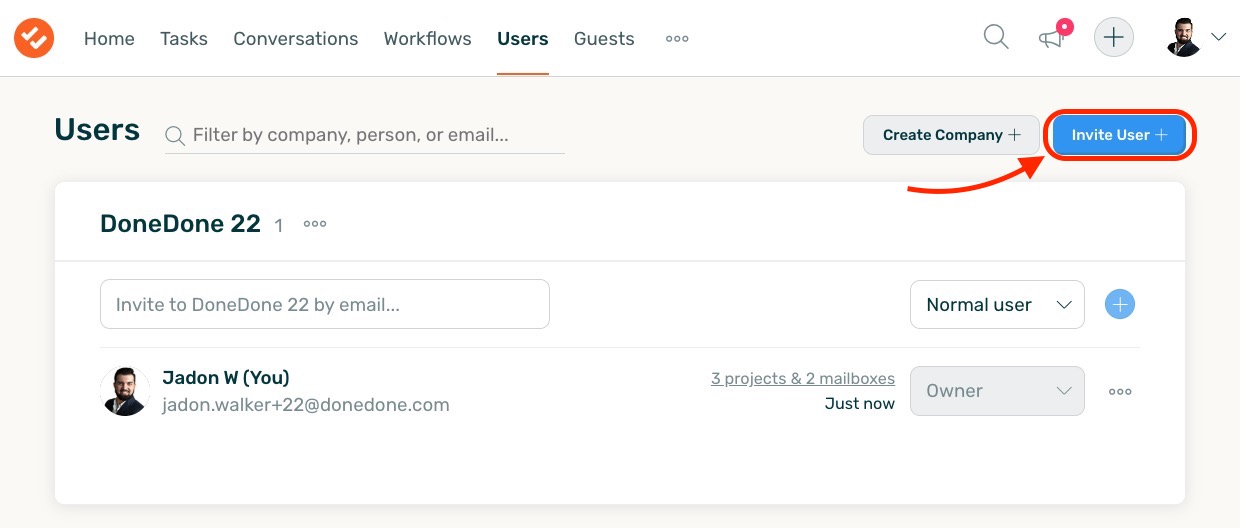
Now that the guest has been deleted, navigate to the “Users” tab on your account.
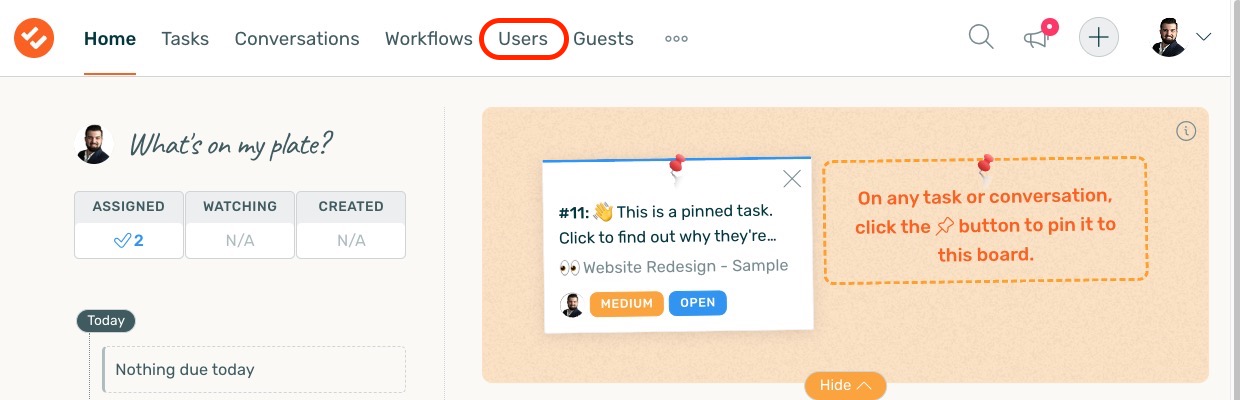
Next, select “Invite User”, as shown below:
From this interface, type in the Guest’s email address, and set their Account Role.
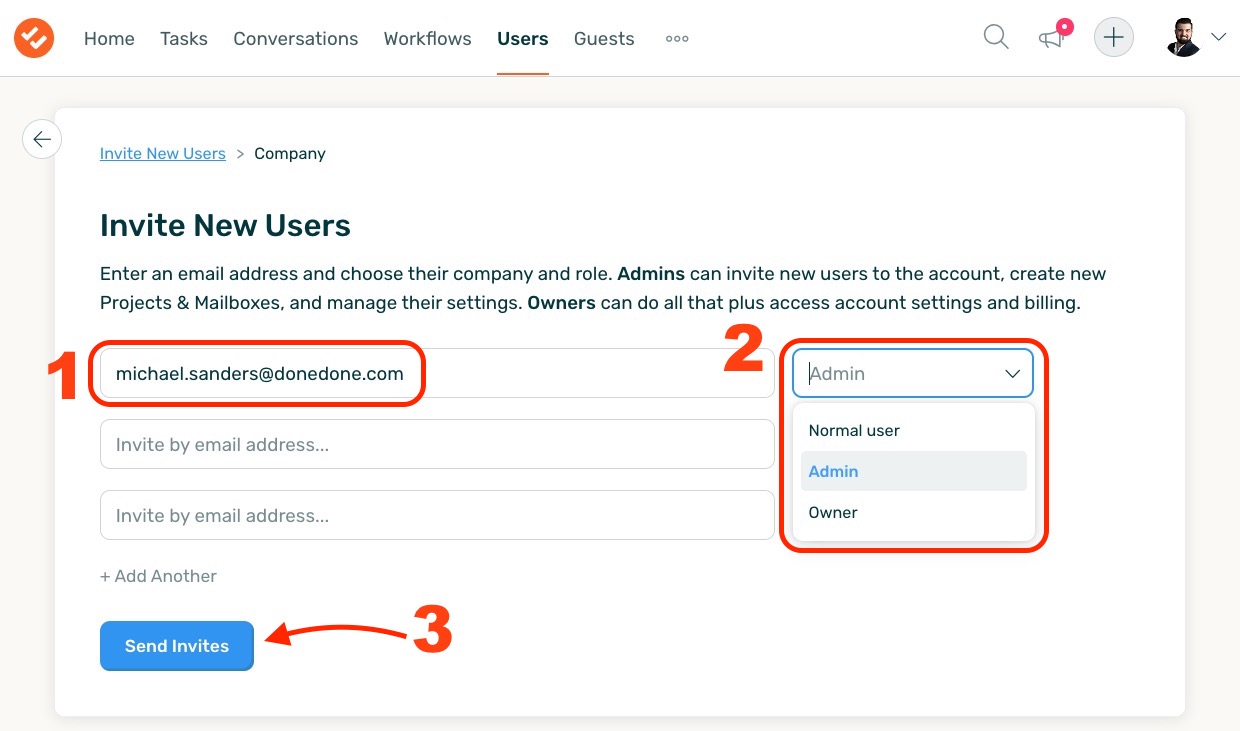
Once you click the “Send Invites” button, this Guest User will receive another email invite. Once they accept this invite, they will be added to your account as a new User with the Role you assigned to them when you invited them.
Don’t forget to assign them back to any tasks which they may have been unassigned from when you deleted their Guest profile!
Deleting a Guest from your Account #
Deleting a Guest from your Account completely removes them. They will no longer be able to access their DoneDone Dashboard or any Projects you had previously assigned them to.
Navigate to the “Guests” tab.
Next, click the three dots for the Guest. Click “Delete User” as shown below.
Next, you will see the interface show below. In this case, I reassigned all of this Guest’s Tasks to myself, which I will reassign to them once they are re-added to my account as User.
Be sure to check the checkbox before clicking “Delete this person”
Conclusion #
With DoneDone, all Guest Users are free.
We hope this article helped you to get all settled in and better-able to use your DoneDone Account with a spirit of free-collaboration.
If you have any questions regarding Guests, reach out at any time on our Contact Us page.


